

Pour Over Coffee Brewing: A Step-by-Step Guide
Justin VanHoyA cone, a filter, a kettle, and a few minutes of attention. That is the whole setup behind pour over coffee brewing, and it explains why the method keeps its hold on home brewers who would rather control the cup themselves than hand the job to a machine.
Pour over is a manual brewing method that continuously passes fresh water through coffee grounds. Because fresh water keeps moving through the bed of coffee instead of steeping in it, the result is a cleaner, brighter cup. What follows is the gear, the grind, and the pours, in the order you will actually do them.
What Pour Over Coffee Brewing Does Differently
Manual pour over brewing leans on gravity and a steady hand rather than a pump or a pressure valve. You pour water over coffee held in a filter, and the coffee drips through into a carafe or mug below.
Two things shape the final cup:
- Fresh water moves through the coffee continuously, which separates this method from immersion brewing, where the grounds sit in the same water for the whole brew.
- The brewer controls the pour, so flow rate and the pattern of the water stay in your hands.
The payoff is clarity. Pour over tends to highlight the natural flavor and aroma of the beans, so a bright washed Ethiopian or a floral Gesha can show up in the cup with more definition than it would through a heavier method. The trade is attention: this is not a brew you can walk away from.
What You Need Before You Start
The equipment list is short. Pour over brewing does not need a machine, just a filter, a cone, a kettle, and a bit of focus. Here is the full kit:
- A cone or dripper that holds a paper filter
- Paper filters sized to fit that dripper
- A kettle, ideally one with a narrow or gooseneck spout for control
- A carafe or mug to brew into
- Fresh coffee, whole bean or ground
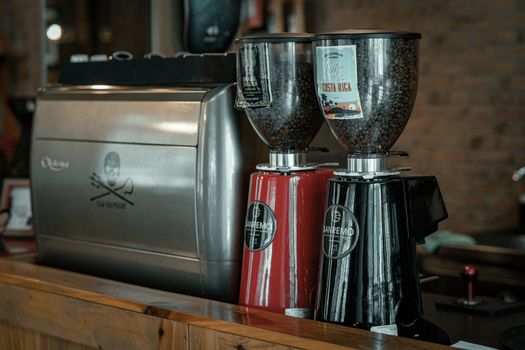
- A grinder if you are starting from whole bean
A gooseneck kettle makes the circular pour easier to aim, but a standard kettle will still get you a good cup. The narrow spout simply gives you more control over where the water lands and how fast it leaves the spout.
One more piece of prep: start with fresh coffee. Coffee loses its best qualities as it sits, and small-batch roasters address this by roasting and shipping on a weekly schedule rather than stockpiling bags in a warehouse.
Step-by-Step Pour Over Brewing
Work through the steps below in order. The process itself is brief enough that a demonstration of the full method can be explained in under 90 seconds, though your first few brews will feel slower than that while you build the muscle memory.
Step 1: Grind Your Coffee
Set your grinder to medium and grind roughly two tablespoons of coffee per 6 oz of water. That is the starting point suggested in beginner pour over guides, and it is a sensible place to begin before you adjust anything.
Medium is the target because water needs to move through the bed of grounds at a steady pace. Too coarse and the water runs through before it has picked up much flavor; too fine and the flow stalls. If you buy pre-ground coffee rather than grinding at home, ask for a medium grind suited to filter or pour over brewing.
Step 2: Set Up the Dripper
Place the ceramic coffee dripper securely on top of your carafe or mug, then seat the filter inside it. A stable setup matters more than it sounds. You will be pouring in circles, and a dripper that shifts mid-brew will throw off your aim and your timing.
Add the ground coffee to the filter and give the dripper a gentle shake so the bed sits level. An even bed gives water an even path through the coffee.
Step 3: Start the Timer and Make the First Pour
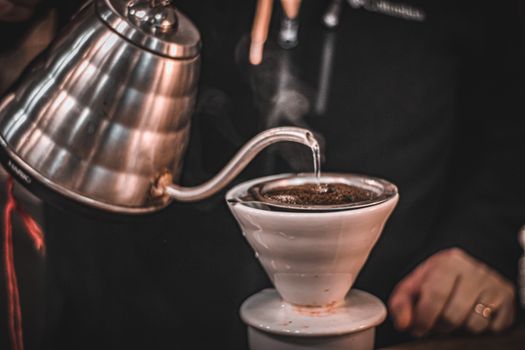
Start the timer and begin to pour water. The first pour should take around 10 to 15 seconds and amount to around 50g of water. Pour in a circular motion rather than dumping water into a single spot.
This opening pour is the moment the whole bed of coffee gets wet. Moving the kettle in slow circles from the center outward helps every part of the bed see water at roughly the same time, which sets up the rest of the brew evenly.
Step 4: Continue Pouring in Circles
Keep pouring in a circular motion, working from the center outward and back again, until you reach your target volume of water. Stay off the paper filter itself where you can. Water that runs down the wall of the filter slides past the coffee rather than through it, which weakens the cup.
Watch the bed as you go. A level bed that stays evenly saturated tells you the pour is steady. If the water pools heavily in one area, slow down and bring the kettle back to the center.
Step 5: Let It Draw Down and Serve
Once the water is in, let the coffee drain through the filter into the carafe below. When the flow slows to occasional drops, the brew is finished. Lift the dripper off, set it aside, and pour the coffee into your cup while it is still hot.
Step 6: Taste and Adjust Next Time
Taste the cup before you change anything. If you do want to adjust the next brew, change one variable at a time: the grind, the pour, or the amount of coffee. Changing three things at once makes it nearly impossible to know which one helped.
Why the Pour Pattern Matters
The circular motion is not decoration. Pouring in circles keeps the bed of grounds evenly saturated, so water passes through the whole bed instead of carving a channel through one spot. Once a channel forms, most of the water follows that path and the rest of the coffee barely contributes to the cup.
That is also why the first pour is measured rather than guessed. Getting a controlled amount of water into the bed over 10 to 15 seconds sets a consistent starting point, so your second brew and your tenth brew have something in common to compare against.
Choosing the Right Coffee for Pour Over
Pour over rewards beans with something to say. Because the method produces a clean, bright cup, subtle characteristics that might be buried in a heavier brew have room to come through. That makes it a natural fit for single-origin coffees, where the point is tasting one farm or one region rather than a blend.
Coffees from Colombia, Ethiopia, Guatemala, and Rwanda all work well as a starting rotation, and each brings a different profile to the cup. Pour over is also a good match for beans that went through distinctive processing, including anaerobic fermentation, and for rare varieties such as Gesha. Those coffees tend to carry the florals, fruit, and layered sweetness that clarity in the cup shows off best.
Buy whole bean when you can and grind just before brewing, since the aroma you notice when you open a bag is the same thing you are trying to keep in the cup. If you prefer the convenience of pre-ground, choose a medium grind and store it properly to slow the loss of freshness. A subscription is one way to keep the supply moving, with fresh coffee arriving on a regular schedule instead of sitting on a shelf until you remember to reorder.
Frequently Asked Questions
What is pour over coffee?
Pour over is a manual brewing method that continuously passes fresh water through coffee grounds. Gravity pulls the water through the filter and into a carafe or mug below. Because the water keeps moving rather than steeping, the resulting cup tends to be cleaner and brighter than immersion brews, with the beans' natural flavor and aroma more clearly on display.
How much coffee should I use for a pour over?
Beginner guides suggest roughly two tablespoons of ground coffee per 6 oz of water. Treat that as a starting point rather than a fixed rule. Brew a cup at that amount, taste it, and then adjust the coffee or the water to suit your preference. Keeping notes on what you changed makes it easier to repeat a cup you liked.
How long should the first pour take?
The first pour should take around 10 to 15 seconds and amount to around 50g of water. Pour in a circular motion so the whole bed of grounds gets wet evenly. Starting a timer before that pour helps you keep the opening consistent from one brew to the next, which makes later adjustments easier to judge.
Do I need a machine for pour over coffee?
No. Pour over does not need a machine, just a filter, a cone, a kettle, and a bit of focus. Gravity does the work of moving water through the coffee. That makes the method inexpensive to start and easy to take with you, since the gear is small and there is nothing to plug in.
What grind size should I use for pour over?
Set your grinder to medium. That is the setting recommended in beginner guides, and it suits the way water moves through a pour over filter. If you buy pre-ground coffee instead of grinding at home, look for a medium grind labelled for filter or pour over brewing so the water has time to work through the bed.


